How to set up Produce Seasons
In this guide
Quick Overview
Create new Produce Seasons
Related articles
Produce Seasons
Quick Overview
When a new pallet is created in ProduceLinc, a Produce Season Code is assigned to it to allow for seasonal reporting. A pallet gets its Produce Season Code based on the Confirmation Date of the pallet (the date on which it was created in the system), the Commodity Group Code, Inbound Channel Code and Outbound Channel Code.
Let’s illustrate with an example:
For export grapes we have set up produce seasons for 2024 and 2025 as follows:
| PRODUCE SEASON CODE | COMMODITY GROUP CODE | INBOUND CHANNEL CODE | OUTBOUND CHANNEL CODE | START DATE | END DATE |
|---|---|---|---|---|---|
| 2024GR-L-E | GR | L | E | 2023-11-01 | 2024-10-31 |
| 2025GR-L-E | GR | L | E | 2024-11-01 | 2025-10-31 |
Grape Pallet A for export (Outbound Channel E) is created in the system on 3 February 2024. The Produce Season Code for this pallet will be 2024GR-L-E
Grape Pallet B for export (Outbound Channel E) is created in the system on 5 November 2024. The Produce Season Code for this pallet will be 2025GR-L-E
New Produce Season Codes must be created before you start packing pallets and receiving pallet files for that seaason. Follow our step-by-step guide below.
Create new Produce Seasons
STEP 1
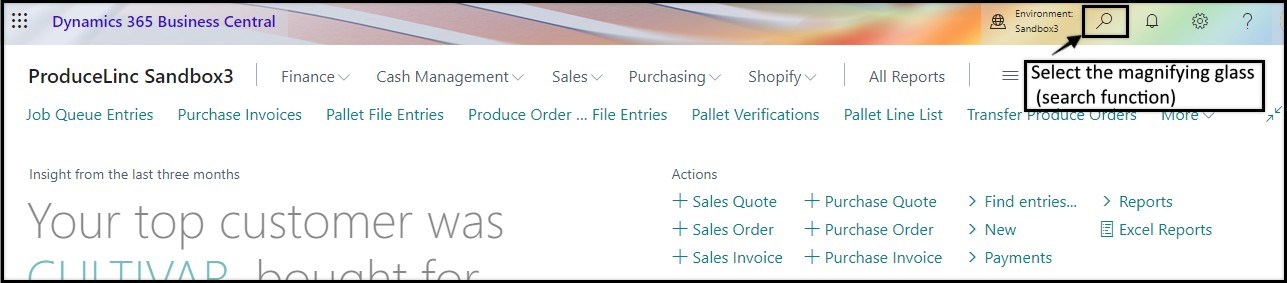
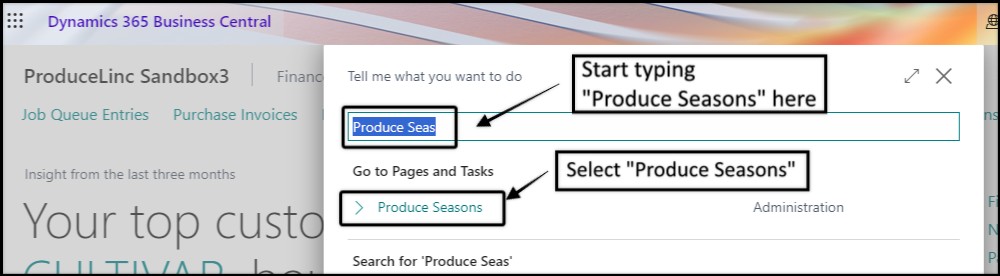
Use the search box to navigate to Produce Seasons.
- Click on the magnifying glass in your Business Central landing page
- Start typing “Produce Seasons” in the search box
- Select Produce Seasons from the list of available options
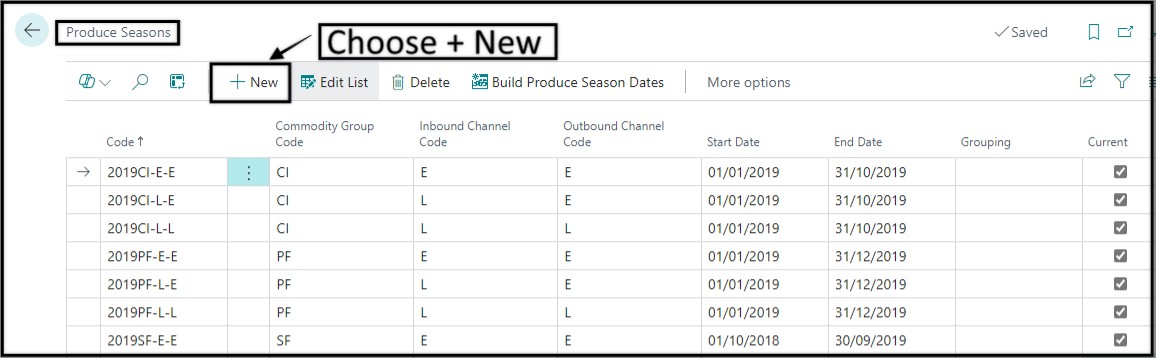
STEP 2
Choose + New in the Produce Seasons page menu to create a new empty record.
![]()
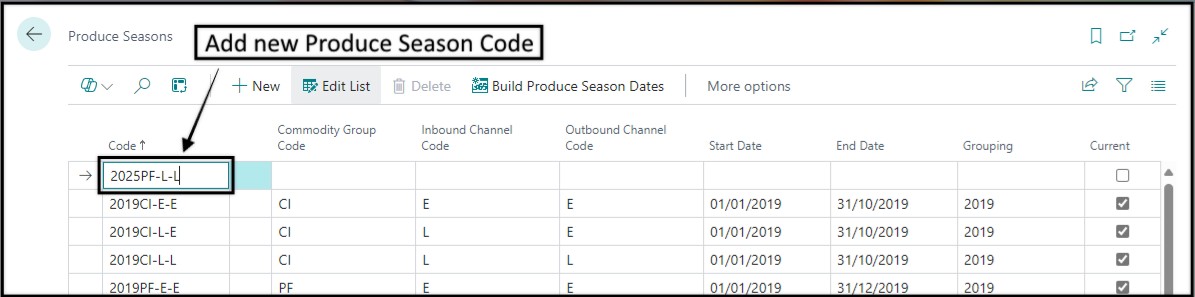
STEP 3
Now add a new Produce Season Code.
This produce season code must be unique. Take into account that Produce Seasons are set up per Commodity Group, Inbound Channel ad Outbound Channel. You should thus not simply enter “2025” as your Produce Season Code. Rather make the code a combination of the Season, Commodity Group, Inbound Channel and Outbound Channel.
Suggested structure for your Produce Season Code:

Start your Produce Season Code with the season value, followed by the Commodity Group. Add a hyphen, followed by the relevant Inbound Channel. Then add another hyphen, followed by the relevant Outbound Channel.
In our example we are going to add 2x new produce seasons for Pome Fruit for the 2025 season. We are adding two seasons, since we will trade in both local and export pallets and thus have two different outbound channel codes for pome fruit.
Based on the suggested structure above, we will make the Produce Season Code for our local pallets 2025PF-L-L, and for our export pallets 2025PF-L-E.
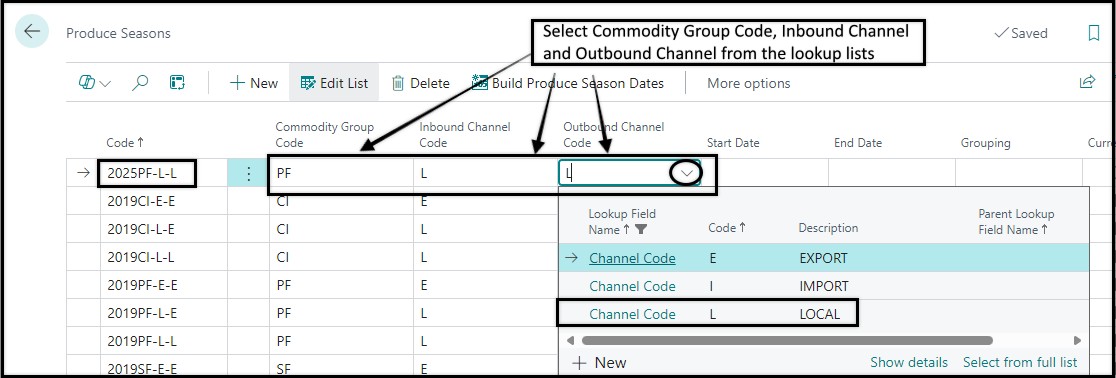
STEP 4
Select the appropriate Commodity Group Code, Inbound Channel Code and Outbound Channel Code for the new Produce Season.
STEP 5
Add the appropriate Start Date and End Date for your new produce season.
Make sure that your Start Date does not overlap with the end date of the previous season.
For example: if the 2024 season for local pome fruit ended on 31/12/2024, then the earliest start date for the 2025 season for local pome fruit is 01/01/2025.

STEP 6
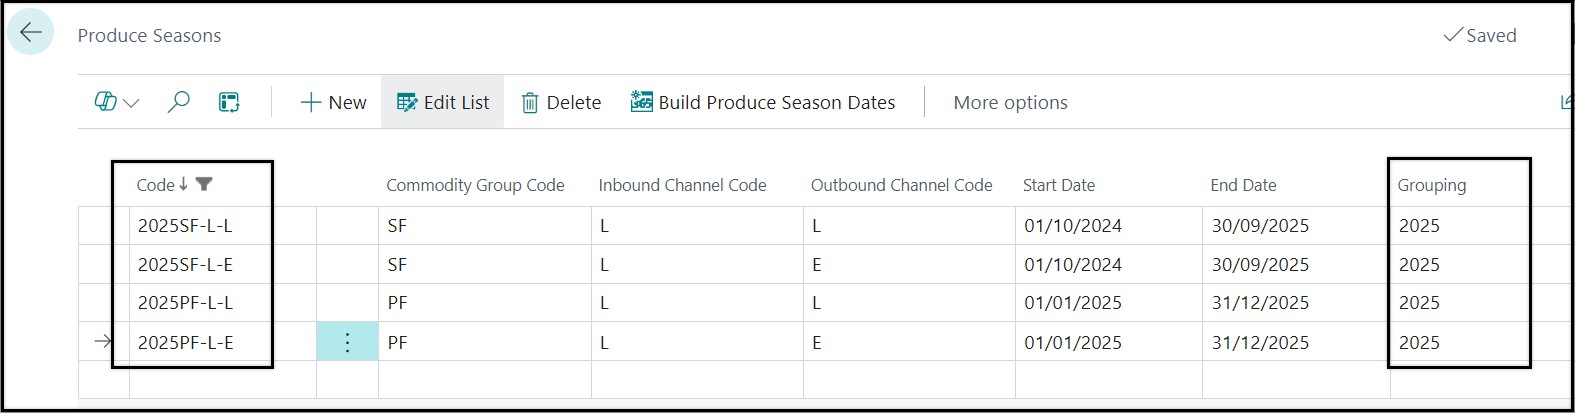
Add a Grouping value. The Grouping field is optional and is used to provide a common overall season in the format of a Year.
Example: We have four Produce Season Codes for 2025 (pome fruit local and export, stone fruit local and export). For reporting purposes, we want to tie all four these season codes together as the 2025 season.

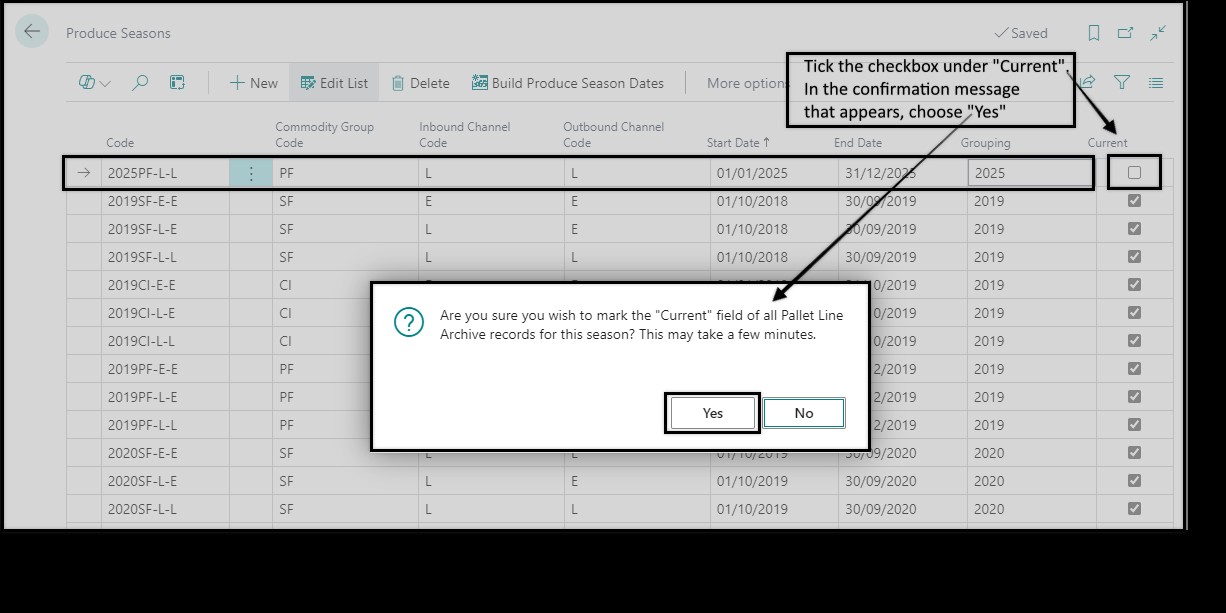
STEP 7
Check the box under Current.
A confirmation message will appear, asking if you want to proceed with updating the current field for existing pallets that may exist in the pallet line archive. Choose Yes in this message.
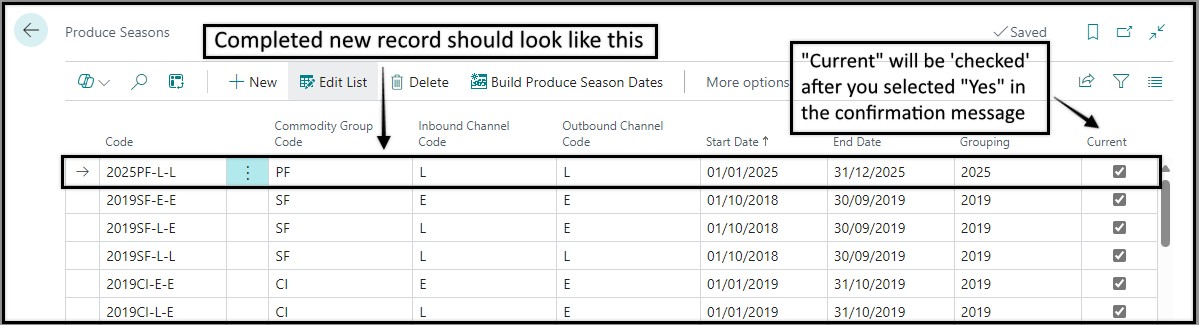
Repeast steps 1 through 7 until you have added all the new Produce Seasons. Then proceed to Step 8 before you close the page.
STEP 8
Choose Build Produce Season Dates in the page menu. This rebuilds a background date table for all the produce seasons in your system.
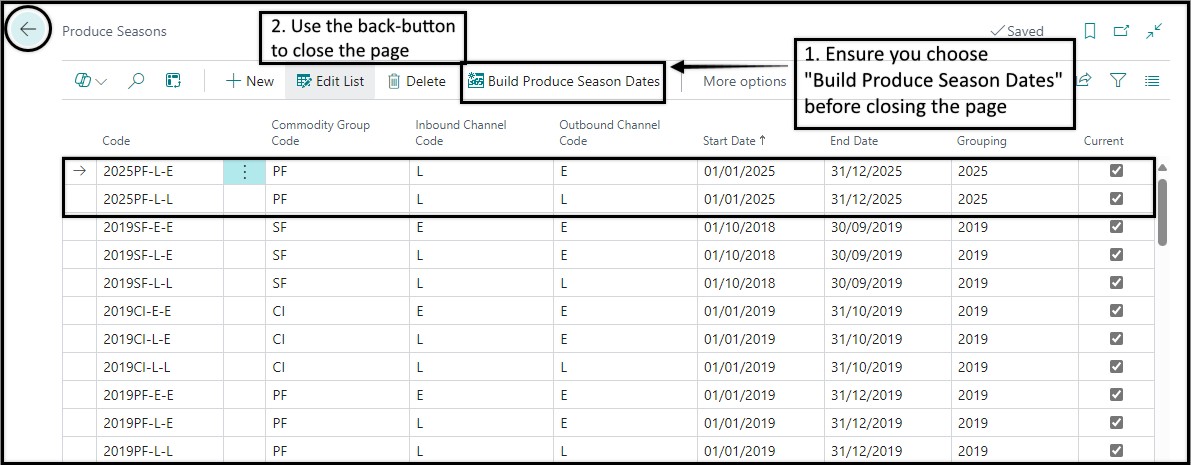
Performing this step is crucial. If you do not perform this step, the system will not allow you to register/create new pallets for the new produce seasons you have just added.
If you do forget to perform this step before you close the page, simply navigate to the page again, and then choose Build Produce Season Dates.
You do not need to select specific produce seasons for which to rebuild the background produce season dates. The system will automatically rebuild the dates for all the produce seasons.